
The sun, the sand, a fruity drink in my hand, the beautiful Florida sun — what more could an elf want? Hi friends, Sparkle here again! I needed a break from all that snow up north so I’m here chilling with my friends at Twinkle Nights. They asked me to share my insights on a very interesting topic: Christmas light hanging tips for beginners.
Now, I’ve been hanging lights up at the North Pole for a few hundred years, so today I’d say I’m an expert. But when I first started, I was a beginner and made plenty of mistakes. I thought I’d share with you the light hanging tips I learned that have made my annual Christmas light hanging routine a breeze.
So, let’s get down to business by starting with the stuff you’ll need.
What you’ll need to get started: a plan
A word of advice, it’s always best to start small and grow your display over time. So, don’t go crazy buying lots of materials right away. The first of my Christmas light hanging tips for beginners is to embrace a four-letter word: PLAN.
Start by taking a picture of your house. It may seem like a silly step because you know your house, right?
However, you might be surprised by the things you’ve never noticed when planning your light display! A photo of your home will help with planning your light display. I highly recommend printing this picture at a local retail store so you can catch all of the nuanced details that your home printer might miss.
Decide what you want to light: the roofline, your windows, maybe around your doors, or nearby bushes or trees. The planning process may take some time, but in the end, it will save you a lot of headaches.
Start measuring
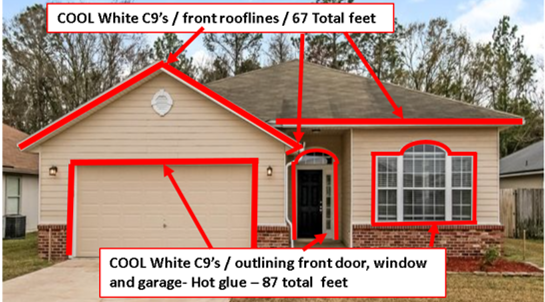
Next, measure out each section to be lit. Once you’ve done this, add up the total length of the areas you want to light up. Now, use the previously mentioned photo of your home to help determine how many strands of lights you will need for each section.
Here’s a pro-level Christmas light hanging tip: buy everything from the same place. This will ensure all the bulbs are the same color and everything is designed to work together. And while you’re at it, here’s a quick list of a couple of other things to pick up while you’re there buying your bulbs:
- Zip ties
- Light clips
- Extension cords
- A timer (more on this later).
Start with the roofline
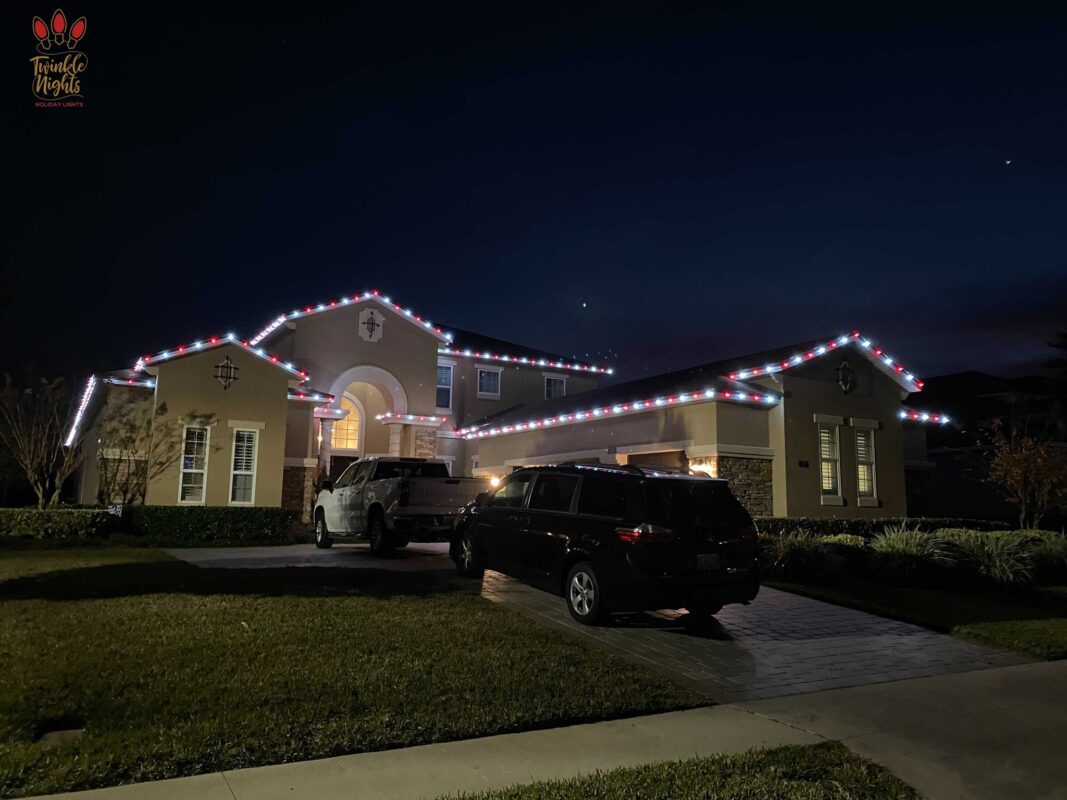
The first place you want to start hanging lights is on your roofline. It’s the largest section of your house, and even if you are only lighting the front of your house, you’ll still use more bulbs on your roofline than anywhere else.
Grab that photo you printed off during the planning stage. On it, find the starting point on your roofline. However, before you climb that ladder, first choose where you’re going to place your light strands. The two most common options are on the gutters or under roof shingles. This is your call as either option works.
Lighting more than the roofline
Turning your home into the best and brightest lit house on the block doesn’t stop with your roofline. Once you’ve covered the basics — your roofline — it’s time to expand your display.
Mini lights can be used to wrap trees and bushes. Smaller strands are also great for being creative and spelling out something on your garage roof!
Don’t forget about your doorways and windows when deciding where to add lights. I love it when I see houses with every window and doorway lit up. They look like gingerbread houses! It also ties the whole lighting display together, helping it look complete and polished.
The right kind of timer
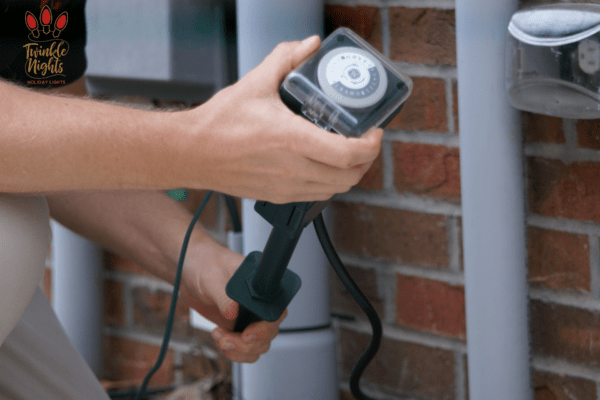
One of the most important components of a successful Christmas light display is the right kind of timer. It really can make or break your whole setup. No one wants their beautiful house and hard work to go unseen because they forget to turn the lights on each night.
As a rule of thumb, you should expect to pay around $15 to $20 for a quality timer. Test it out in the store before purchasing. A beginner’s mistake is simply buying the cheapest timer on the shelf. However, if the circular dial that controls the timer doesn’t flow smoothly, it’s going to break. Plus, lower quality timers will sometimes let moisture in and cause the component to stop working.
Other materials
Here’s a Christmas light hanging tip you might not have thought of. Universal plastic clips make hanging your lights super easy. So, stay safe by attaching them to your light strands before you head up the ladder. This will make the installation process a whole lot easier.
Speaking of ladders, a ladder that effectively reaches the tallest point of your lighting display is an essential item when hanging lights. A partner who can steady the base of the ladder is a great tool as well!
Be sure to buy outdoor-rated extension cords to connect your light strands to the power box or grounded power receptacle.
Are you planning to hang wreaths on your windows? Suction cups are a great way to securely attach them without leaving any marks on your home or window trim. Now that all your decorations are hung, step back and enjoy your handiwork.
Takedown tips
As much as I hate to admit it, Christmas isn’t a year-round event (I wish it was!). At some point, you’ll need to take your lights down.
Before the season is over, buy a designated box to store your lights. When wrapping your strands, wind them with the female end wrapped inside to allow the male end to be easily accessible for testing next season.
If you’ve decorated with garland or wreaths, take them down and hang them in the garage to dry out. This will keep them from getting moldy. Once they’re dry, they can be placed in a bag or box and stored with your lights.
One more thing, and this will save you lots of time next year. Take a picture of your finished light display as soon as it’s complete. This will help you replicate your masterpiece next year and expand it with newer additions as you grow your display.
Christmas light hanging made easier
Some people enjoy everything that goes into creating the perfect Christmas light display. The planning, preparing, purchasing, testing, hanging, removal, and storage of your lights and decorations can be a welcome chore.
It can also be a dreaded one. If you’re one of those people that cringe when you think about climbing that ladder and hanging your lights, Twinkle Nights is here to help! For the least stressful light-hanging experience, turn to the professionals. They are trained and prepared to provide you with the best-looking holiday light display around.
As always, if you have any questions or if keeping track of all the clips, bulbs, and cords seems like too much work, contact Twinkle Nights!
Here are some other resources to help light up your holiday season!
Reduce, Reuse, Recycle – How To Put Your Old Or Broken Christmas Lights To Good Use